Someone truly said, “Coffee even turns doing nothing into pure poetry!” Who wouldn’t love to start their day better with a cup of coffee and keep themselves fueled for the entire day! What if we told you that you can make a perfect coffee in a coffee maker that warms up your soul and starts your day right!! Don’t believe me? Continue reading to know how to kick start your day by preparing a delicious, flavorful, and satisfying cup of coffee and become a Coffee Guru.
How to Use a Coffee Maker?
A coffee maker can seriously be a game-changer in your coffee-making. Whether you want to make a cappuccino or an espresso, you should have the best brewing machine and also know how to use it. Let’s get started with the below steps:
Step 1: Choose the Right Coffee Filter and add it to the Filter Basket
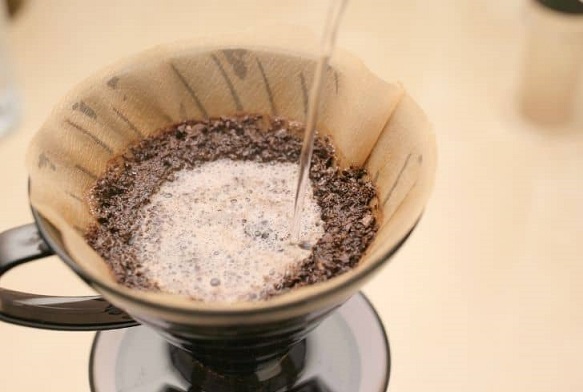
The very initial step, to begin with, is by adding a coffee filter to the filter basket. Choosing the right coffee filter can often be confusing to many. To help you with that, we suggest using a natural or bleached filter with the right size and thickness. Refrain from using generic versions and other cheap filters that can alter the quality of the coffee.
Many coffee makers, these days, come with a specialized filter. These kinds of machines are becoming very popular as they are environmentally friendly. Always use these filters specially designed for the coffee maker rather than a paper filter.
Step 2: Check out for the Coffee-to-Water Ratio
The next step is to measure the coffee. The coffee-to-water ratio is majorly dependent on the coffee machine and the type of coffee you want to make. Ideally, 2 tablespoons of coffee for every 6 ounces of water is the standard ratio to brew. You can also check for the instructions in the manual of your coffee maker, before deciding on the ratio.
Some special blend coffees often come with certain specifications of the ratios. Ensure you read the instructions on the package for an amazing coffee.
Step 3: Measure out Adequate Water
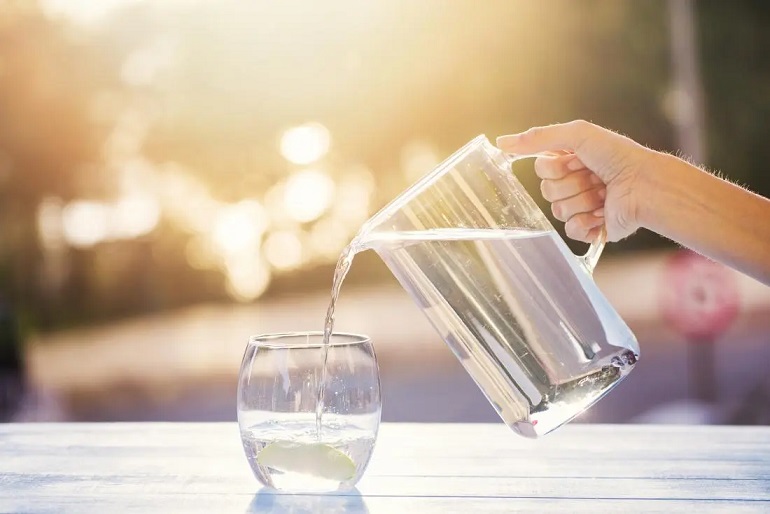
After measuring the coffee, the next step is to measure the water. Every coffee pot has markings on the side to help you with the measuring. Always pour the water from the opening that is usually above or behind the filter.
If you are a first-time user of the coffee maker, you may feel tempted to pour the water directly through the filter basket. Avoid doing that as it may result in some problems. After you pour the water, put back the coffee pot in its place, i.e., on the warming plate.
Step 4: Plug in the Coffee Maker
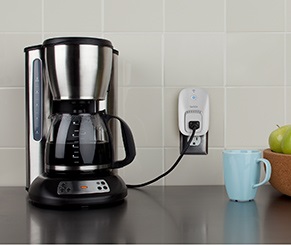
Plugin the coffee maker and turn it on. Some coffee makers automatically start brewing the coffee when switched on, while others require manual time setting to do the same.
Step 5: Wait until the Coffee Completely Finished Brewing
Patiently wait for the coffee pot to fill completely before pouring the coffee. For those who need coffee right away, some coffee makers have come with a “pause” option. Selecting this setting allows anyone to pause the brewing process and fill their cup with coffee.
Step 6: Throw Away the Paper Filter after Brewing
If you are using a paper filter, make sure you remove it and throw it away after using it. Do not leave the coffee grounds in the machine as it may make your next pot of brew bitter. If you are using a mesh filter, do not forget to remove the coffee grounds from it, and throw them in the garbage. After doing so, do wash the filter thoroughly.
Stovetop or Moka Coffee Maker
The key to making an excellent cup of coffee that suits your taste is the method you choose to do. The stovetop or Moka coffee maker helps you brew espresso coffee at home. Below are the steps that would navigate you in using a Moka coffee maker for brewing a coffee to perfection.
How to Use
Step 1: Preparing The Moka Coffee Maker
Here’s step one. Even before starting with the process of preparing the coffee, we need to prepare the stovetop espresso maker first. For this, we should separate the coffee maker, as mentioned below:
- Water Chamber – This is the lower chamber at the bottom of the device for filling water
- Filter Screen – This is for filling the coffee grounds, which allows the brewed coffee to rise from the screen
- Upper Chamber – This is for the rich and concentrated finished coffee
Step 2: Grind The Coffee Beans To A Fine Consistency
The second step is to grind the coffee beans to a fine consistency. Ensure it is not too finely ground as it may congest or block the equipment.
Step 3: Fill The Lower Chamber With Water
The third step in the process of making espresso in Moka is to fill the lower chamber or the base of the stovetop coffee maker with adequate water. Make sure it is cold and filtered water, and just below the safety valve.
Step 4: Add The Coffee Grounds To The Moka Pot
As the fourth step, add the coffee grounds to the filter basket. See it to it the coffee is in level with the surface of the filter. Once the filter basket is ready, immediately move on to the next step.
Step 5: Set Up The Moka Pot
After adding the coffee grounds, the next step in the process is to prepare the rest of the Moka pot by tightly screwing the upper part of the equipment to the base. Ensure the filter screen is in place before firmly screwing the top section.
Step 6: Heat The Pot!
After reassembling the stovetop espresso maker, place it on the burner of the stovetop and turn it on. Make sure the flame does not exceed the bottom size of the pot and wait until the water boils. If you want to heat the pot on a low flame, take your time to do it until you extract the full flavor of the espresso.
Step 7: Wait Until The Coffee Is Ready
During the process, you will hear a gurgling sound. Pay attention to that sound, which is a clear indication that the brewed coffee is ready. Turn off the stove and do not open the lid of the upper chamber as the coffee may spurt over you. After turning off the stove, do not leave the Moka maker on it, instead remove it!
Now pour the coffee into a cup and add sugar or water as per your preference. The strong Italian espresso is now ready for serving.
Note: Do not overheat the pot during the brewing process, as it can leave a burnt taste to the espresso.
Single Serve Pod Coffee Maker
Specially designed for single-cup coffee brewing, a single-serve pod coffee maker enables you to brew different types of coffee based on your preferences. The option of brewing one cup of coffee at a time guarantees quick, hot, fresh, and personalized coffee just like the way you want it to be!
How To Use?
A single-serve coffee maker is very easy to use and clean as well. Check out the steps below for using a single-pod device.
Step 1: Add water into the reservoir present at the back of the machine
Step 2: It has a pump at the bottom which extracts water inside and then pushes it up through the machine.
Step 3: There is a heating element inbuilt with the machine that allows heating the water to a specific temperature when the water passes through it.
Step 4: There is a narrow needle inside through which the water pumps up, increasing the pressure.
Step 5: The hot water that gets pumped up through the narrow needle now passes through the pod
containing coffee grounds. This allows the coffee grounds to release the flavor while passing.
Step 6: To prevent the coffee grounds from falling into the coffee, the bottom of the pod has a filter screen or paper.
Step 7: This enables your coffee to drip down easily into your cup.
French Press Coffee Maker
Popularly known for a slow-brewing method and flavor extraction process, a french press coffee maker is a great option for coffee connoisseurs who want to indulge in the complete flavor from the coffee grounds. This is a manual device with some great features.
How to use
A french press coffee maker is very easy-to-use. Though it requires some extra manual effort, the coffee is worth all the wait and the efforts.
Step 1: Add ground coffee into the pot using a measuring spoon.
Step 2: After adding, pour hot water over it.
Step 3: Let the coffee ground swirl around the hot water to release the flavor from it.
Step 4: Your rich and concentrated hot coffee is now in your cup.
Note: It may take nearly 5 minutes to make a cup of coffee.
Tips for Brewing the Best Drip Coffee
Learn how to brew that perfect morning beverage at home while saving on a bundle of your time in a regular drip coffee maker.
1. Keep your coffee maker clean and neat from the inside and out
Your coffee maker can have gunk and other calcium deposits accumulated in it, which can give your coffee a bitter taste and a noticeable odor. Hence, it is always suggestible to clean the brewing machine very often. You can also check for the instruction of how to clean the coffee maker before doing it.
2. Use only quality and freshly ground beans
If you want to sip a fresher, rich, and flavorful coffee, say no to pre-ground beans. Always buy fresh coffee beans whole and grind them yourself than going for a pre-ground coffee. Also, make sure you store your coffee beans in an air-tight container to retain the flavor, aroma, and unique taste.
3. Measure the coarseness for your brewing method
Measuring the correct coarseness for your preferred brewing method is a thumb-rule. Since the coarseness or thickness of the grinds may differ for every coffee brewing method, ensure it is not overload or less but adequate to achieve that optimum flavor.
4. Ensure correct temperatures for brewing
In the brewing process, the correct temperature for ingredients is a no-compromise. Always see to it that the temperature of the water is 195–205 °F (91–96 °C). It can even be below boiling but not cold because, cold water does not extract enough flavor from the coffee beans, and it will ultimately affect the taste.
5. Use a thermal carafe
If you have extra coffee left in the maker, store it in the thermal carafe to keep it warm. You can save your time and the coffee, too, without having to compromise on the taste.
6. Pre-heat the coffee pot
Before using the coffee pot pre-heat it using some warm water.
Some Frequently Asked Questions:
Ans: No. You cannot make an espresso with a regular coffee maker. However, you can brew pots of coffee that are rich and super-strong as per your preferred option. For this, all you have to do is grind your coffee beans more finely than usual and add them to the basket. Add the same amount of water (do not change the quantity). This helps in stronger extraction of the coffee ground, making a very strong brewed coffee.
Ans: The best way to clean a coffee maker is by pouring equal parts of water and vinegar into it. After pouring, start the brewing process just like you normally do. You can turn off the coffee maker after the process. Dump the solution and use clean water. Repeat this at least twice to clean the coffee maker.
Ans: Cleaning your coffee maker periodically i.e., once a quarter is highly recommendable. Don’t forget to clean all the pre-assembled parts of the coffee maker after every pot.
Ans: You can use cold water for brewing your coffee in the coffee maker, which will automatically heat the water.
Ans: Once done with the brewing, do not leave the coffee maker on. This can sometimes result in an electrical fire, very rare though. Hence it is suggestable to switch off, especially when there is no automatic shut off feature to the machine.
Ans: Yes, you can add more coffee or water while brewing. However, the brewing process may stop once you add to it, and you need to start it again by clicking the start button. Sometimes, the hot water may splash when doing so. It is always safe to switch off the machine first, add what you want to, and then turn it on again.
Ans: No. Using milk can turn it to sour quickly inside the machine. And, to get rid of it, you may have to use lots of soap water. Better use some water in very little quantity and then add milk in your carafe.
Ans: Never re-use coffee grounds as the maximum flavor gets released in the first usage itself. Re-using the coffee grounds will only make the coffee bland and tasteless.
Ans: You can use your coffee maker without a filter as there are many alternatives to it. You can use a paper towel by trimming them to fit exactly inside the coffee maker. You can also use a clean cloth napkin when you’re running out of filters.
Conclusion:
Wrapping up, you now know how to use the coffee maker to prepare your perfectly brewed cup of coffee. What are you waiting for! Get started with your morning cup of coffee in the most exciting way. If you feel like there’s something we missed out in the article or you want to know extra information from us, please do mention in the comments section below. We’ll get back with more insights on the same.
