An inverter is one of those appliances that has become a necessity in almost every home. With the frequent power cuts, it helps in providing uninterrupted power access.
Are you planning to purchase one, and wondering if the installation will be a hassle? What if we told you that inverter installation is not as complex and complicated as you think!
Installing an inverter is very easy, and you do not need the help of a professional for the same. Further, you can save on your installation and labour costs.
Here is an ultimate guide for installing and connecting the inverter at home. In this article, we will discuss the steps to follow for the installation process. Also, we will learn about some of the safety precautions you need to take.
So, here we go with our discussion.
But before that, let us take a look at some safety measures you need to follow when installing an inverter.
What are the Precautions to Take While Installing an Inverter?
Though installing an inverter is easy, you should know and follow some general safety precautions for your own benefit. Here they are:
- You should always place the inverter on a flat surface, whether you put it vertically or horizontally.
- Never install your inverter in an environment that is exposed to heat. This includes places with exposure to direct sunlight, heat ventilation systems, radiators, etc.
- Install the inverter in a place that is away from moisture or rain.
- You should always keep the inverter dry and never touch it with wet hands. It will not only damage your inverter but can also be harmful to you.
- When installing an inverter, make sure that you keep the bottom surface of the inverter a few inches up from the floor. It will help in providing better ventilation and also good heat dispersal.
These are a few safety precautions that you should keep in mind while installing an inverter at your home. Now, let us get into the main deal and learn how to install this device.
What are the Steps for Installing an Inverter at Home?
For installing an inverter, you need to follow some steps. We have enlisted the steps below to help you with the easy installation process. Make sure you follow them diligently. Also, it is advisable to refer to the user manual before getting started with the procedure.
Step-by-Step Process for Inverter Installation:
Step 1: Select a Suitable Location to Place the Inverter
When it comes to installing an inverter at your home, location plays the most significant role. There are certain places you have to avoid for placing the device. You may say what are the preferable locations and which places are the most suitable to install an inverter at home? Well, we are here to guide you. Let us find out below.
- You should always install the inverter in an area of your house which is away from flammable materials or other toxic substances. Please remember that it is a thumb rule to follow.
- Do not install an inverter in your basement if there is no proper ventilation.
- Find a place in your house that has enough free space. Installing your inverter in such areas will improve the output performance of your device as there will be proper ventilation. Moreover, you will not have any other devices in the surroundings to disturb the operation.
- Avoid installing the inverter in the following places:
a. Near heat sources. It includes direct sunlight.
b. Where flammable substances are kept.
c. Moist or stuffed areas of your house.
The best places to install:
- Dry and cool areas of your house.
- Free space to ensure proper heat disperse and ventilation.
Once, you find out the suitable location for your inverter installation, you can move on to the next step. It is to mount the inverter in the location securely.
Step 2: Mounting the Inverter
This is another crucial step, and ignoring it could eventually affect the life of your inverter. Mounting the inverter in the right position is very important. You do not want the components inside the inverter to bang around or the entire inverter to fall off. Do you!
Below are the points to help you with the same:
Most inverters come with predrilled holes in the unit so that mounting these devices could be easy. All you have to do is use bolts or screws to mount the inverter on a secure surface. Now, you may ask, what is a secure surface. Here is the answer.
A secure surface means a space that is not a high vibrational surface. Also, it should be a place where heat sources and flammable materials are not nearby.
When mounting the inverter, make sure you put it on a supportive surface like non-vibrating perpendicular walls, a stable vertical surface, and safe reachable ceilings.
Avoid being creative in this step. Do not mount your inverter anywhere you wish. Also, do not forget to refer to the instruction manual given by the manufacturer for recommendations to find the best mounting place.
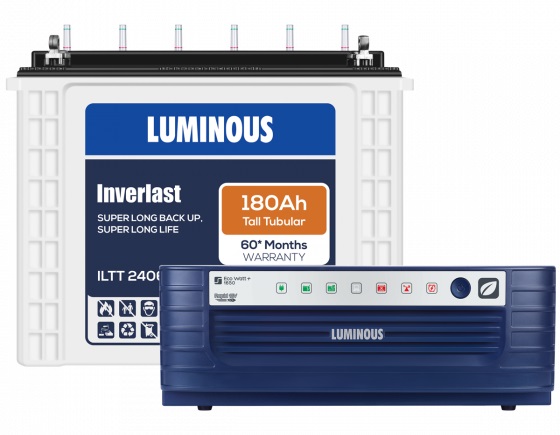
Step 3: Battery Installation
The next step is to connect the inverter with the battery so that it draws power. It is a very crucial part of your inverter installation process. Here is how to do it:
- First, unscrew and remove the rear panel of the inverter.
- Now, raise the top lid of the main housing. This will unhide the interior side of the unit.
- Install the positive terminal of the first battery in a way that it faces right on the rear side of the main housing.
- Now, install the second battery with the positive terminal to the left.
- After connecting both batteries, check the. Upon checking, carefully secure the rear panel.
Step 4: Review the Battery Cable Connectivity
After you install and connect the battery, it is time to check whether the connectivity is proper or not.
Check the battery cable connectivity without fail. It will help to load the maximum amount of working energy to the appliances of your house that are connected with the inverter.
You must check the cable connectivity of the battery and inverter with low resistance wiring. It is because low resistance wiring sends a high current to the destination in low voltage, and there is a minimum ‘load’ on the inverter.
Step 5: Setting up the Inverter
The last step is to set up the inverter. This is how you can do it:
- Firstly, place the inverter assembly facing forwards on the top of the main housing.
- Once you do this, reach the electricity board meter of your house and disconnect the power.
- Now, connect the cable with the inverter. You can refer to the instructions in the user manual to connect the electric cables. Usually, electric cables run from a double pole switch circuit. Connect one end of the electric cable with this switch and the other end with the IEC connector.
- Connect the cables from the load to the IEC connector and then to the rear panel output connector of the inverter.
- Now, connect the wiring harness from the inverter battery to the input connector at the rear panel.
- Once you finish all the connections properly, the final step is to turn on the electricity board meter and the switch lightning circuit. It will switch on the inverter.
Step 6: Inverter Connection Diagram
Below is the inverter connection diagram for your better understanding. This diagram will provide you with all the insights into how the inverter runs your TV and fan during offloading lights (highlighted by Red Colour Wire). You can change the load as per your requirement by connecting it to the inverter.
We can also see the Neutral (Black Wire) is common in all the loads. It means you will not need any individual Neutral connection.
Conclusion:
Installing an inverter is no rocket science, and it is clear from the above-mentioned DIY information. However, if you find this task intimidating, you can contact a qualified technician to install it for you.
Regardless of who installs the inverter at your home, you must be aware of the installation process. Furthermore, you must know about the safety precautions that you need to keep in your mind. For instance, you should always install your inverter in dry and cool places. Besides that, you must keep it away from heat sources, mount it on a secure surface, etc. These are a few things you need to be careful of.
I hope this ultimate guide provided you with all the insights on installing an inverter at your home without professional help. Make sure you refer to the instructions manual from the manufacturer while setting up this incredible machine.
Let us know if you still have any questions or need more information on inverter installation. We would try our best to answer all your queries at the earliest.
Please share your feedback with us by letting us know if you have any inputs to add. Do post them in the comments section below. We want to know if you feel that we have missed out on any points. We want to hear from you. Please feel free to share your suggestions with us.
Stay healthy and stay safe!!!
