In today’s age, a sandwich maker is one of the best companions to whip up quick breakfast. They are compact, portable, and super easy to operate.
If you are a first time user and worried about how to operate sandwich maker? Then we have got you covered.
In this article, we will help you learn how to use a sandwich maker in the easiest way possible. Also, you will learn some other uses of the sandwich maker so that you could make something new every day.
Before we go further, take a look at types of sandwich makers, as this will later make the manoeuvring steps easier. Let’s begin, shall we?
Sandwich Maker Types:
Sandwich makers are basically available in two types
1. The Regular One
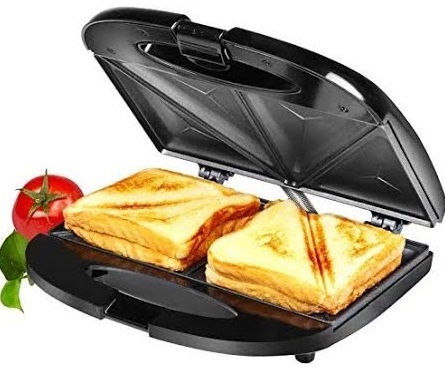
The traditional maker is a less expensive electrical appliance that has metal plates (upper and lower) specially designed to prepare sandwiches. All you have to do is put the slices in the triangle-shaped pockets of the maker, press it and then seal it. Your perfect sandwich is ready in no time.
2. Grilled Sandwich Maker
The other type is the grill sandwich maker, also called a panini press. It comes with removable heating plates that facilitate grilling the sandwich when pressed. Place an assembled sandwich between the heated places and press it. Your hot crisp grilled sandwich is ready.
The supreme advantage of a grill sandwich maker is that you can use it for pre-heating purposes, as well. Most of these devices come with non-stick plates, enabling you to use less amount or no oil/butter. This makes it a healthier option for preparing your favourite breakfast.
How to Use Sandwich Maker?
We would really appreciate those reading the instructions from the manual that comes along with the sandwich maker. If you do not, please follow the basic directions, as mentioned below:
Step 1 – As the initial step, plug in your sandwich maker and turn it on. Now, allow it to get heated up, while the device remains closed. Most models come with an indicator light that tells you when the appliance is ready. Usually, it will only take a few minutes for heating.
Step 2 – Meanwhile, start preparing your sandwich by adding your favourite fillings to it. After you finish, you can spread some butter on the outer sides of the slices. However, it is optional, and you can always avoid it if you do not like it.
Step 3 – Once the assembled sandwich is ready, open the appliance. Before you place the item, you can spray a mist of oil on both the plates of the maker if you did not apply butter on the sandwich. Again, this is optional and you can choose to avoid this.
Step 4 – Now, place the sandwich on the bottom heating plate. Please be careful when placing and see to it that you do not touch the plates.
Step 5 – After adjusting the sandwich, press it by closing the lid of the maker. If your appliance has a front clamp, make sure you close that as well.
Step 6 – Wait until the indicator light shows up or for about three to five minutes before you open the sandwich maker.
Step 7 – Use a wooden spatula to remove the sandwich from the maker. (You can also use a silicone one.)
Step 8 – After removing, turn off the appliance and unplug it. Open the sandwich maker and allow it to cool down completely.
Step 9 – After it cools down, take a damp sponge to wipe off the plates and store the appliance.
Tips for Making the Best Cheese Sandwiches
Here are some tips for making some grilled cheesy-licious sandwiches. Give it a try and you will love it for sure.
#Hack 1 – Apply some butter on the outer surfaces of the bread slices or spray oil on the sandwich maker plates. This will give your cheese sandwich a crunchy, crispy texture and the best flavour. Most sandwich makers come with non-stick plates that will not allow your food to stick to the plates.
#Hack 2 – Do you want to prepare the best cheese sandwich at home? Try using melting cheese like cheddar, swiss, American, etc., on the bread slices. Make sure that it does not come out of the border. Else, the melted cheese will start oozing out from the bread, leaving a mess on the plates.
#Hack 3 – Choose the best bread that is appropriate for your sandwich maker. You will need a little sturdier bread for preparing a super-crisp, and cheesy crust sandwich. Panini press-style or grill sandwich makers are compatible with almost all types of bread. However, if you are using regular sliced bread, a normal sandwich maker with square style is the best bet.
How to Use Sandwich Maker for Other Recipes?
Let us look into some of the best recipes that you can experiment with in these amazing appliances. Trust me, these dishes will not cost you a thing:
1. Egg Sandwich: Some special sandwich makers available in the market help you make egg sandwiches easily. Let us say you are using a normal sandwich press for cooking egg between the bread slices. When you press the maker, the egg will start spilling from the sides of the bread, making a mess on the plates. If you use an egg sandwich maker for the same, you can make that perfect sandwich within no time.
2. Omelettes: Who told you that you could not prepare omelettes in a sandwich maker? Advanced models from sandwich manufacturers come with added features that will help you cook an omelette. The modern versions allow you to cook the below recipe that will turn out to be fabulous.
- Firstly, plug in your sandwich maker and switch it on. Now, allow it to heat up for some time.
- After it gets heated, add butter or oil to the sections or plates, and allow it to heat.
- Now, pour the beaten egg into the triangular sections. You may add other ingredients like cheese or vegetables to it.
- Close the lid of the sandwich press and allow it to cook for a minute or two.
- Then, flip it to the other side and allow it to cook for a minute or two.
- After the surface turns brown, the omelette is ready.
3. Fish or Meat:You can cook fish or meat on your sandwich maker. This is all you need to do.
- Heat the grills.
- Place the strips on the heated plates.
- Press them by closing the lid.
- Wait for a few minutes to allow the meat to cook.
- Your perfectly cooked crispy meat is ready.
4. Paneer Tikka:Cooking quick paneer tikka on your sandwich toaster can be fun. It is the easiest recipe that you can try without any fear of failure. Let us take a look at the cooking method.
- Marinate the paneer with all required spices and ingredients.
- Heat the grills of the sandwich maker.
- Now, toss the paneer pieces on the plates and allow them to cook.
- After a minute or two, flip the pieces and allow them to cook.
- Cook until both sides get nicely toasted and your yummy paneer tikka is ready.
Similar quick recipes you can try in your sandwich toaster are French toast, pastries, donuts, pizza pockets, etc.
What Else Can You Prepare with Sandwich Maker?
You can get creative enough with your sandwich maker by experimenting with various recipes other than preparing cheese sandwiches. Bring out the chef in you by trying out these innovative ideas on your appliance:
- French Toast
- Cakes and Brownies
- Biscuits
- Ice Cream Cones
- Mixed Cheese Toast
- Grilled Vegetables
- Caramelized Foods
- Fried Eggs (Omelette)
- Burritos
- Cook Steak or Meat
When experimenting with the above recipes, you might discover that these are nowhere close to the sandwiches.
How to Prevent Bread From Sticking?
Most modern sandwich makers come with non-stick plates. If yours does not have a non-stick feature, try implementing the below hacks to prevent the bread from sticking to the plates. You can do the same for a non-stick one, as well, to retain the non-stick coating.
1. Season the Sandwich Plates: Just like your cast-iron pan needs seasoning, your sandwich toaster plates also do. However, you do not have to follow a lengthy process, unlike cast iron.
- Apply a small amount of oil (sunflower or vegetable) to the plates before using the appliance.
- Keep doing it regularly to ensure the non-stick coating on plates or to make sure the plates do not lose their non-stick ability.
2. Season the Bread You are Using: The other hack you can follow to prevent the bread from sticking to the plates is, by seasoning the bread itself. We all know that applying butter to the sides of the bread slices when making a grilled cheese sandwich does not require any skill.
Use the same process that you do with the regular sandwiches. While adding butter can give great flavour and crispy texture to your snack, it might add extra fat, too. To avoid the same, you can use olive oil instead.
How to Clean a Sandwich Maker?
Are the leftover cheesy residues stuck to the non-stick surface? Cleaning a sandwich maker after its usage is a simple and easy task. Here are a few tips that let you know how to clean a sandwich maker.
Do double-check with the manufacturer’s instruction manual before cleaning the sandwich maker.
- Before cleaning this appliance, you have to disconnect it from the electrical power supply and let it cool down completely.
- To prevent the buildup of burnt pieces of food residue, you have to clean the non-stick surface of the cooking plates after every usage.
- Take a soft damp cloth/sponge with a little mild soap on it and use the cloth to clean the smooth surface of this appliance.
- Pay special attention to areas where oil gets trapped while cleaning inside those cooking plates.
- If the plates of your sandwich maker are removable then take them out to clean it more easily.
- Struggling to clean any stubborn residue within grooves, then wrap chopstick end with a damp dishcloth and rub it in between the grooves to loosen and remove the hard-to-reach grime.
- Wipe it off with a clean cloth on both the inner and outer surface of the sandwich maker.
- Dry it completely before storing it.
- For best cleaning results, you have to check your manufacturer’s instructions before you start the cleaning process to get an idea on how to clean it effectively.
Note: Clean the cooking plates when they are lukewarm to remove any oily residue, crumbs and spilt ingredients. Never rinse the sandwich maker in water and avoid using abrasive cleaning products for its cleaning.
Conclusion
I am sure this article gave you the necessary tips to follow when using a sandwich maker. You can try a variety of recipes on this powerful kitchen appliance to control your hunger pangs and satisfy your food cravings.
What are you waiting for! Discover the chef in you by indulging in the culinary experimentation process.
Write to us in the comments section below if you find this article insightful. You can even share your experiences if you tried any of the recipes, as mentioned in this article.
If you have more information or recipes to share with us, do not hesitate to let us know. We would be more than happy to hear from you.
Until then, Happy Snacking!
